今回はsonibleの「smart:limit」について書いていこうと思います。
![](https://sounds-detour.com/wp-content/uploads/2022/09/e4206378dbea7ad7aea7fc9146a55812-1024x710.png)
smart:limit
smart:compでお馴染みsmartシリーズのlimiterバージョンです。
UIはどちらかというとsmart:comp2の方に近いですね。
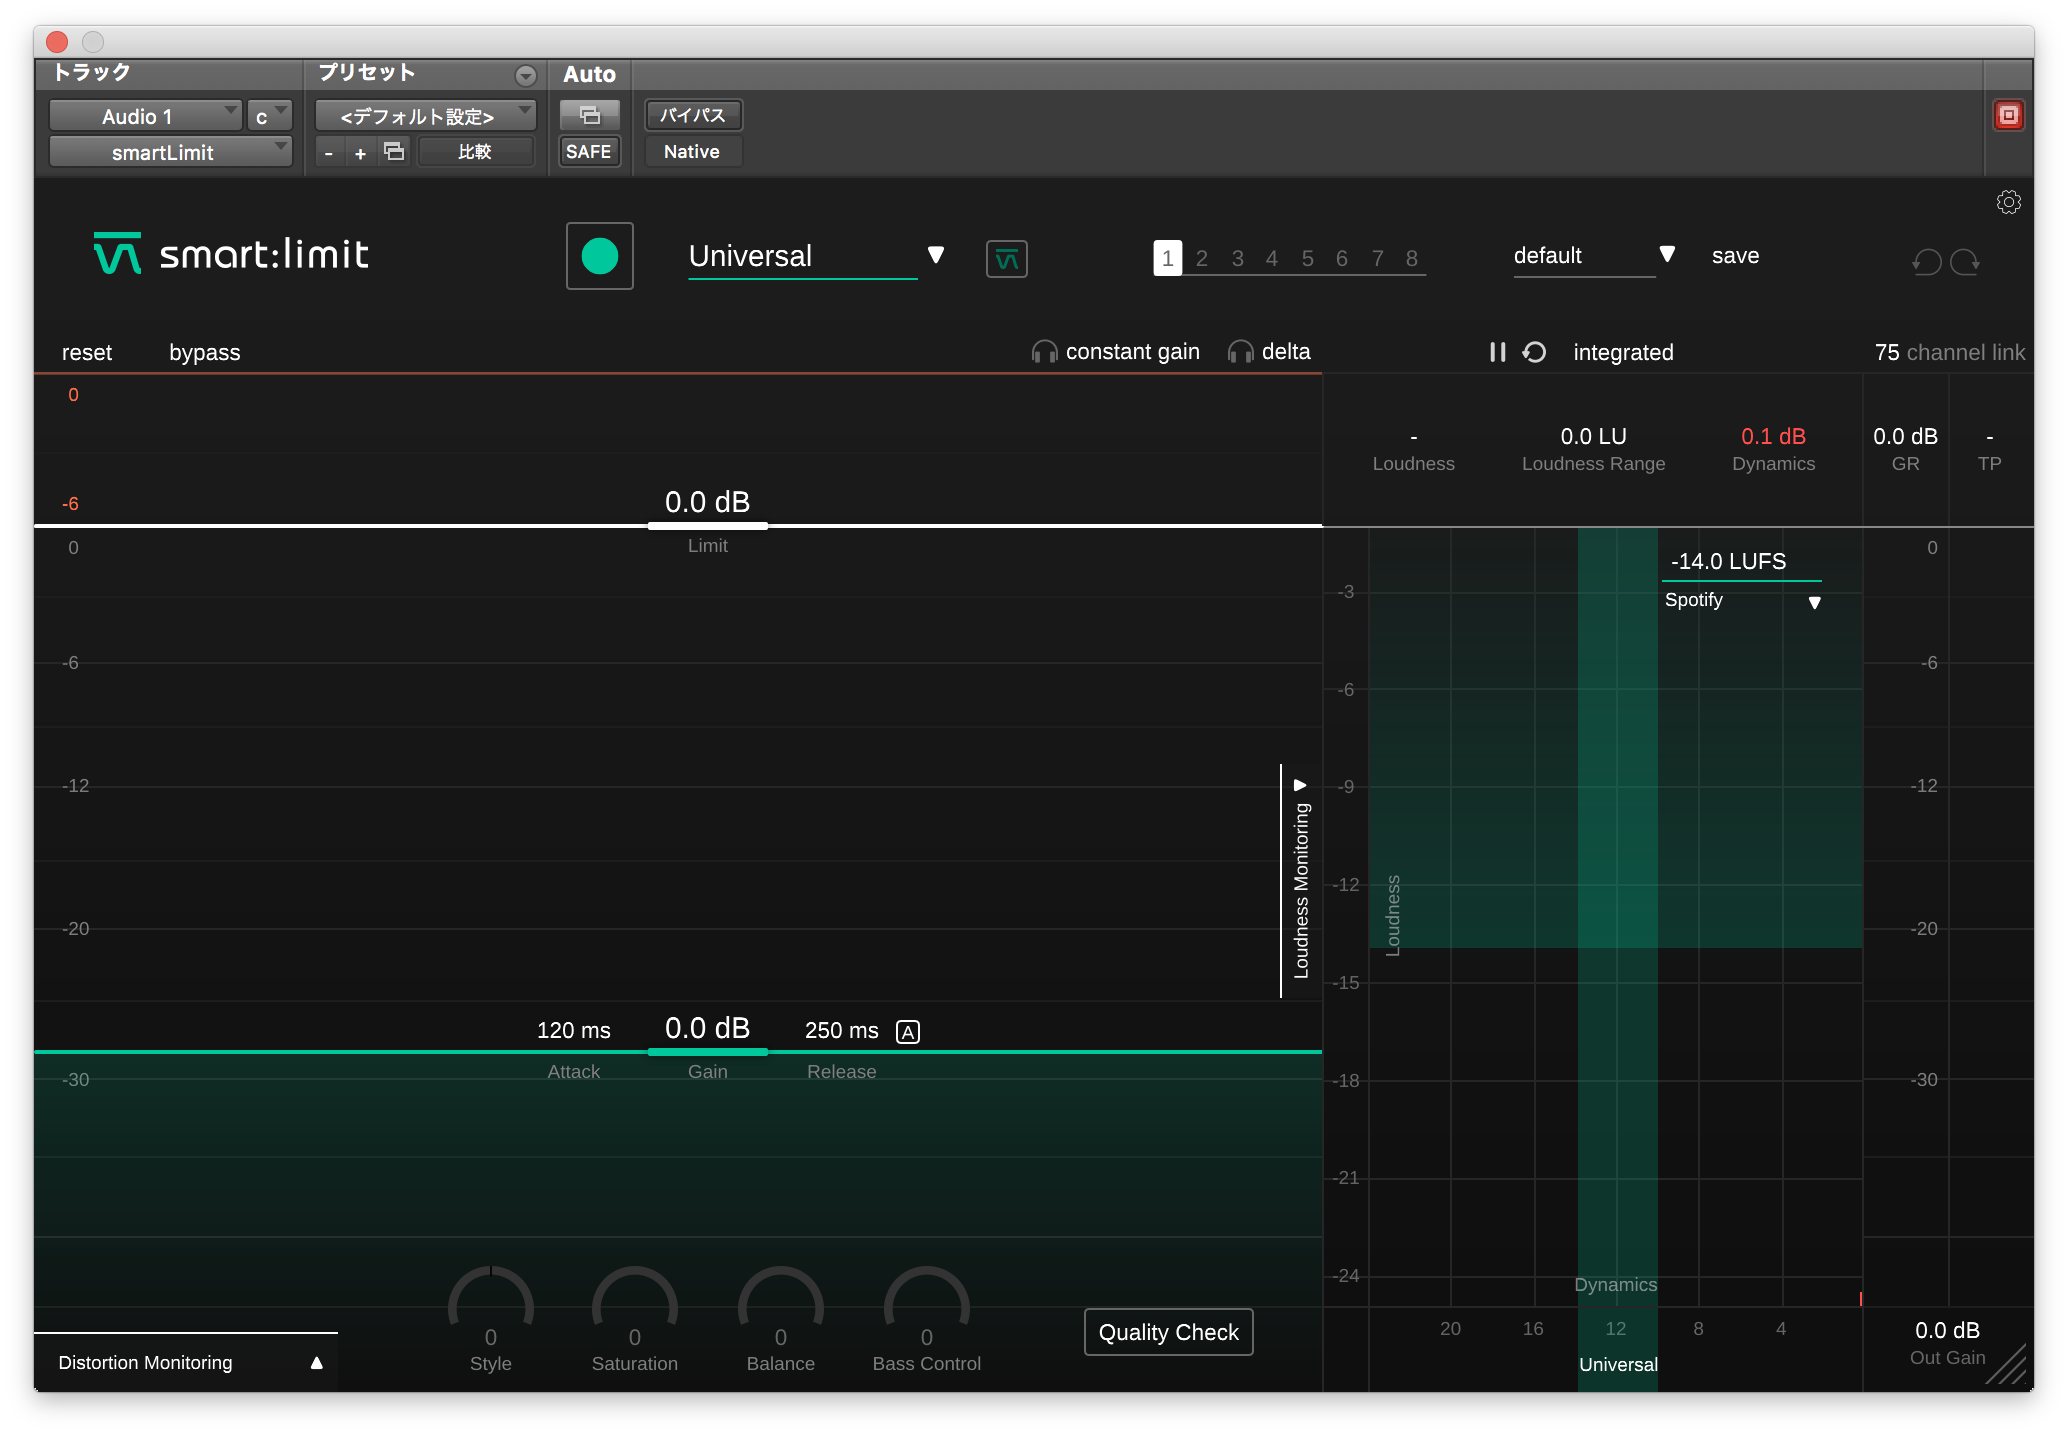
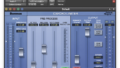
とりあえずみていきましょう。今回のバイパス↓
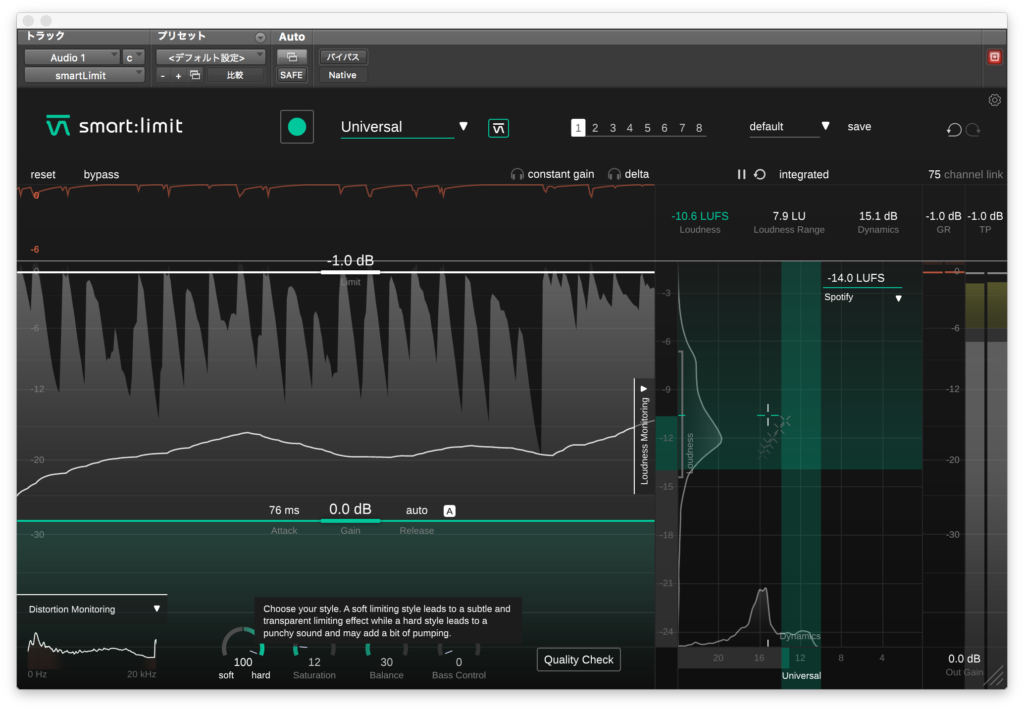
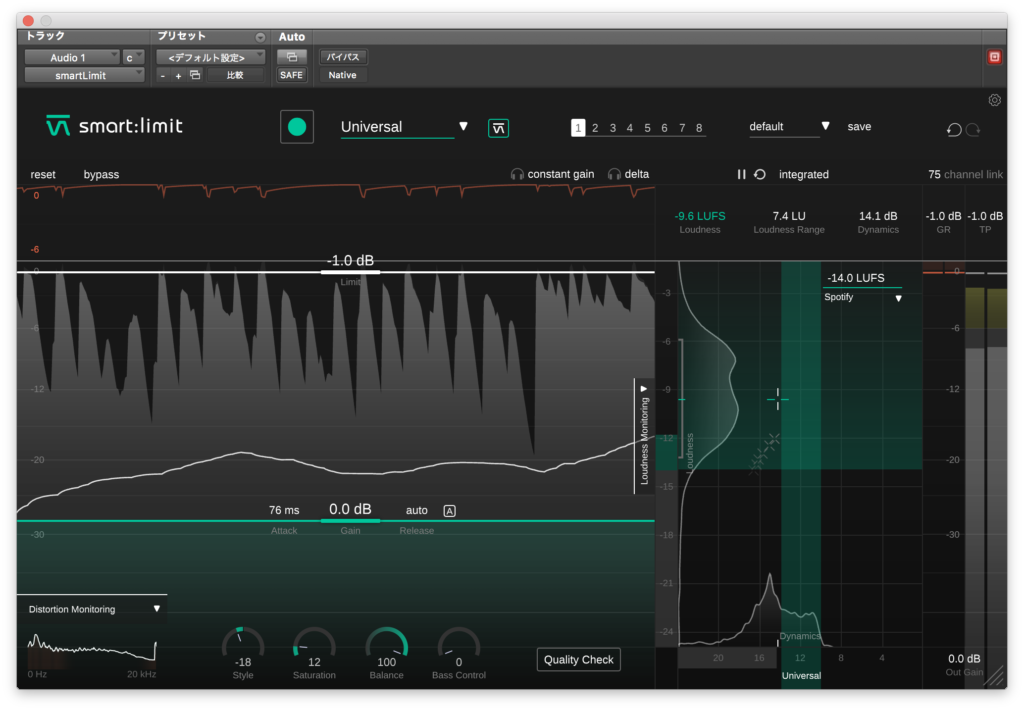
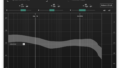
デフォルトだとこんな感じ↓
![](https://sounds-detour.com/wp-content/uploads/2022/09/48c5ebe70c2a13b075663ec45ba92bbb-1024x710.png)
使い方
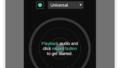
AI機能の使い方はcompと同様にソースを再生しながら中央やや左上にある緑の●ボタンを押してしばらく待つといういつものやつですね。
![](https://sounds-detour.com/wp-content/uploads/2022/09/ae1f5beb4c8dbb47cb5196b773efb4c6-1024x710.png)
![](https://sounds-detour.com/wp-content/uploads/2022/09/f62b4a132b38e8e6fb47c95de306b317-1024x710.png)
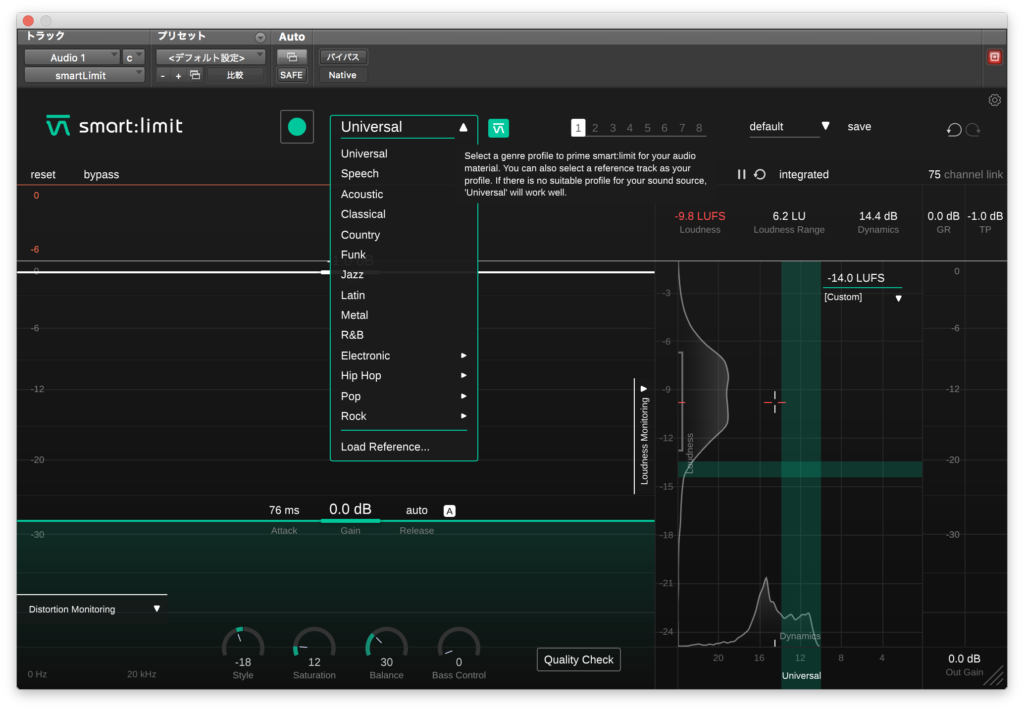
ちなみにパターンの選択肢はこんなものがあります。
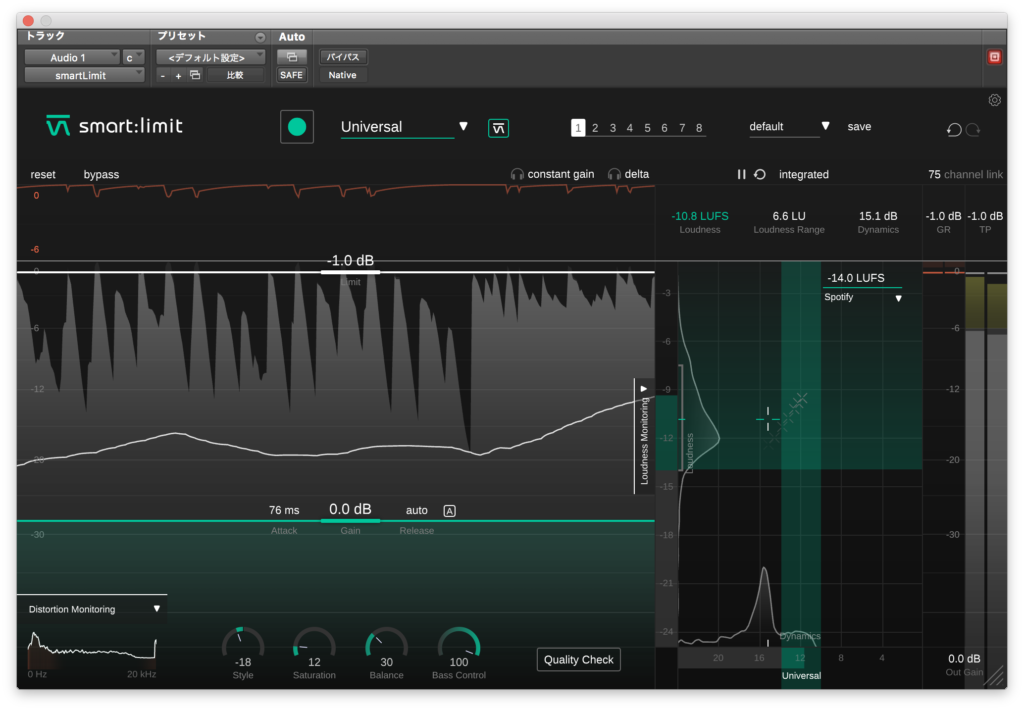
![](https://sounds-detour.com/wp-content/uploads/2022/09/3215ea0711be708958bba5be73dc0731-1024x710.png)
順番に試してみます。
![](https://sounds-detour.com/wp-content/uploads/2022/09/4a617c894147d44c651938607016d452-1024x710.png)
![](https://sounds-detour.com/wp-content/uploads/2022/09/e8f06183a298f7e9a2b4f69474be9136-1024x710.png)
![](https://sounds-detour.com/wp-content/uploads/2022/09/dea3c837ba0753e7c77be0cc1cf650ce-1024x710.png)
![](https://sounds-detour.com/wp-content/uploads/2022/09/a2be4025710f12abcc78f64b3f7cc734-1024x710.png)
![](https://sounds-detour.com/wp-content/uploads/2022/09/1f5199a1fec5753a6f0295bdfd6aeb19-1024x710.png)
![](https://sounds-detour.com/wp-content/uploads/2022/09/afb2aa7548439147d531f8adf7c6ab49-1024x710.png)
![](https://sounds-detour.com/wp-content/uploads/2022/09/8a96ee278add12d6a5cb4f4949a2b687-1024x710.png)
![](https://sounds-detour.com/wp-content/uploads/2022/09/ce35fb2977aa43bd85eaa70b72cbb326-1024x710.png)
![](https://sounds-detour.com/wp-content/uploads/2022/09/96b9226776f626fa6960d9c4781b1b90-1024x710.png)
![](https://sounds-detour.com/wp-content/uploads/2022/09/6d76b8fe1cb307f70e4f34278073d91f-1024x710.png)
![](https://sounds-detour.com/wp-content/uploads/2022/09/1e7b25c8b5fbf2ac4797fb2cff69ace1-1024x710.png)
![](https://sounds-detour.com/wp-content/uploads/2022/09/968742ad8a15e962d20ff06585cd1fcb-1024x710.png)
![](https://sounds-detour.com/wp-content/uploads/2022/09/da8b08ce876f7682d1cc5664d7441d51-1024x710.png)
![](https://sounds-detour.com/wp-content/uploads/2022/09/2d35e00a74f3546bdf466d9f7fe176ed-1024x710.png)
![](https://sounds-detour.com/wp-content/uploads/2022/09/2c4bc14866ca5514755bd1883d336701-1024x710.png)
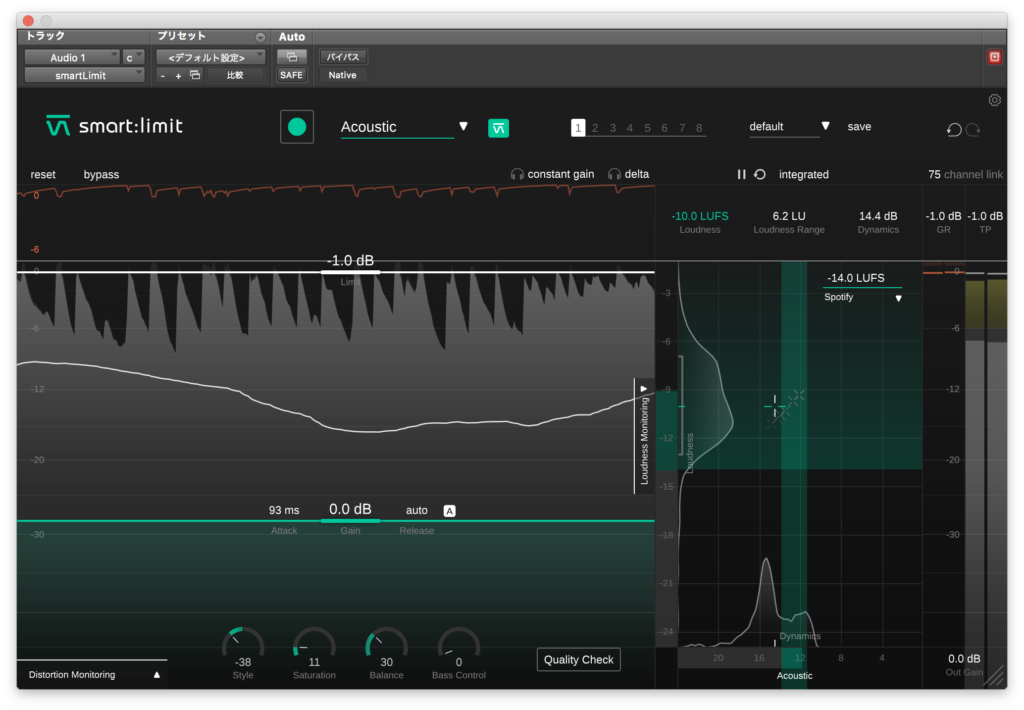
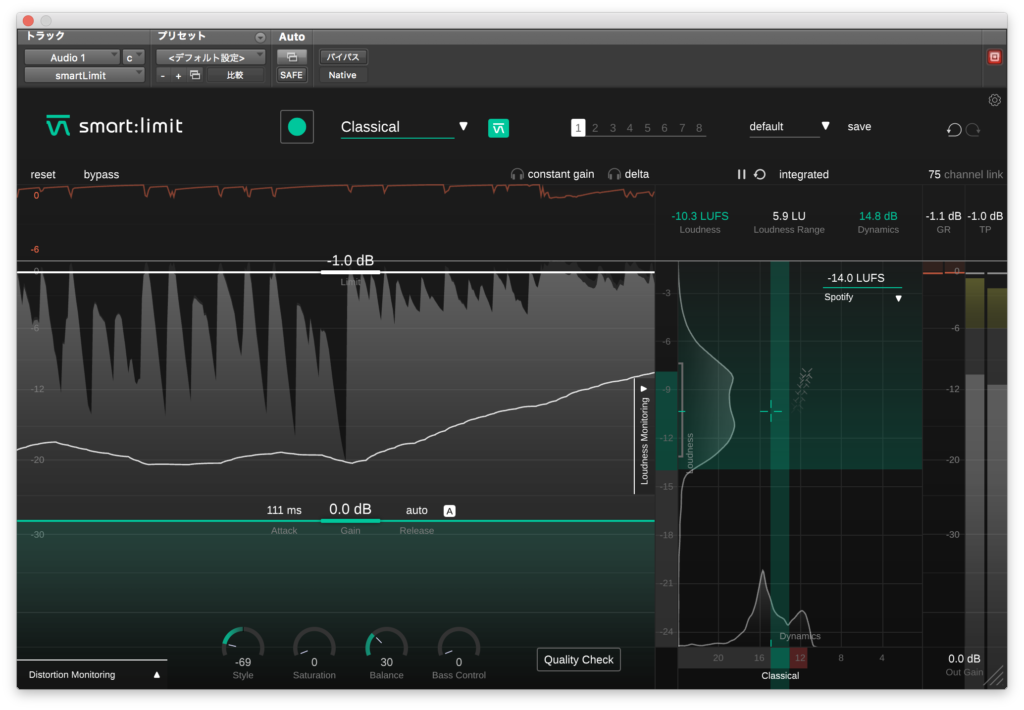
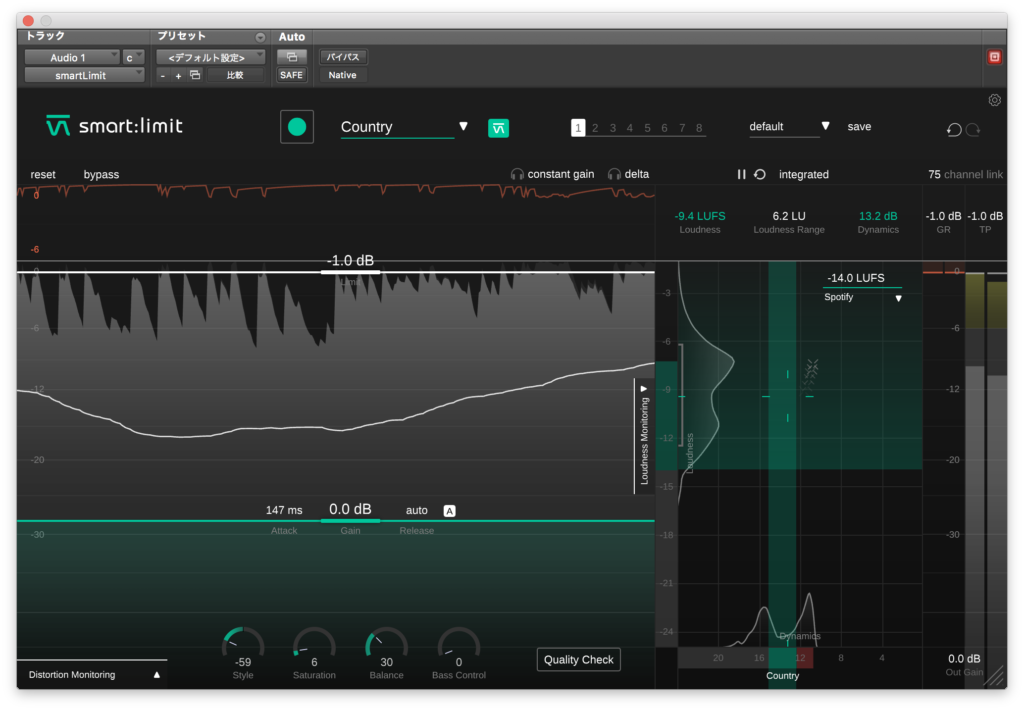
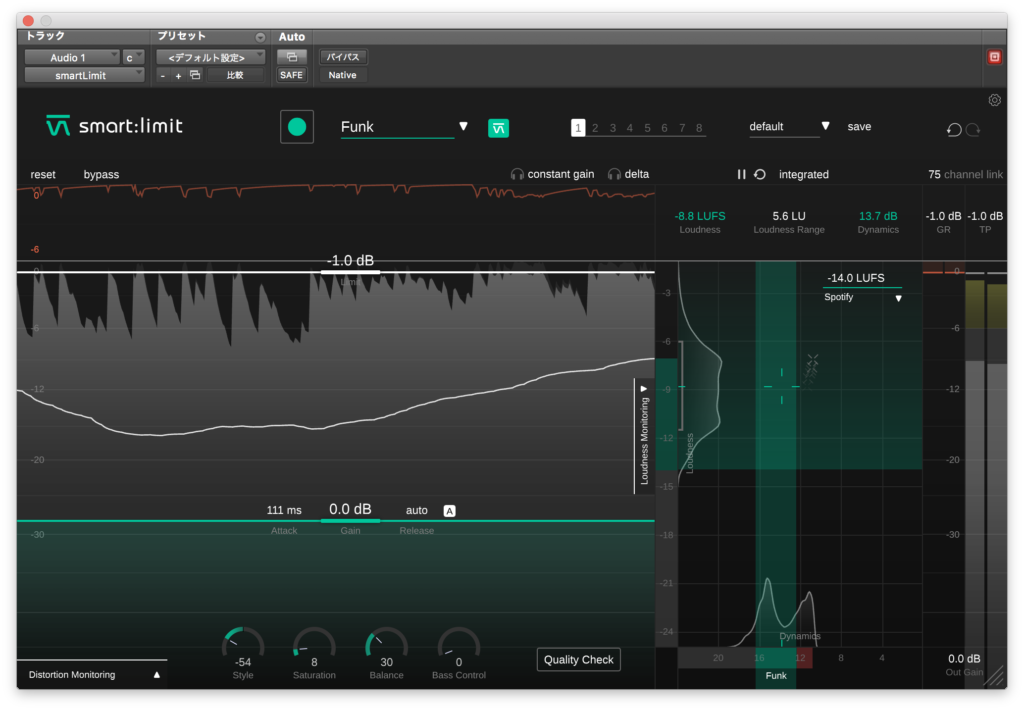
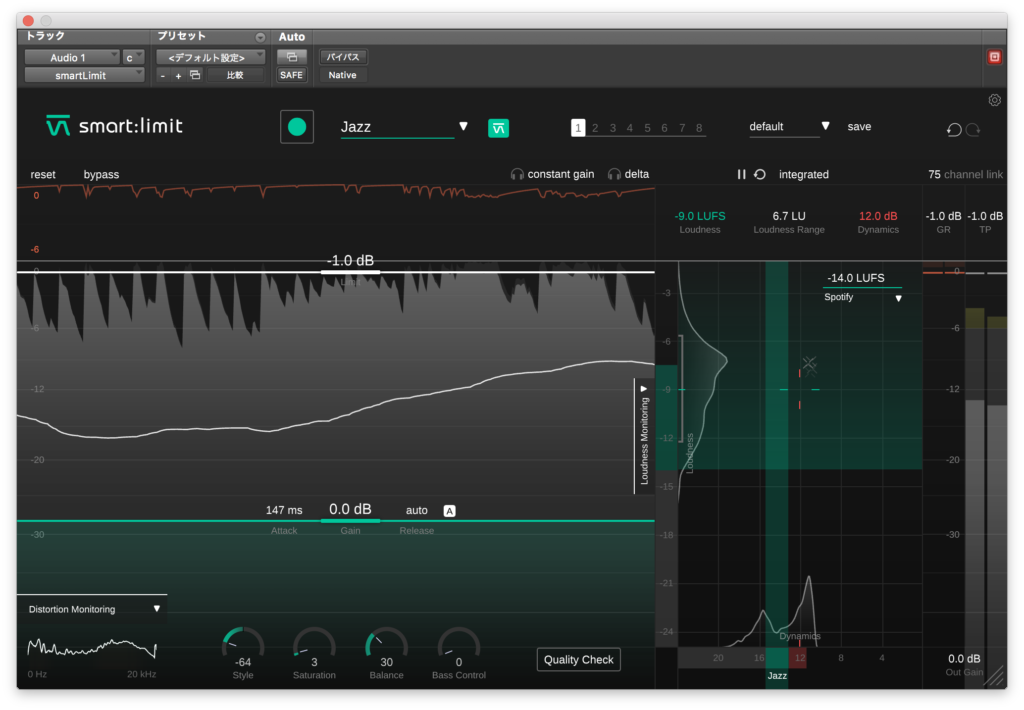
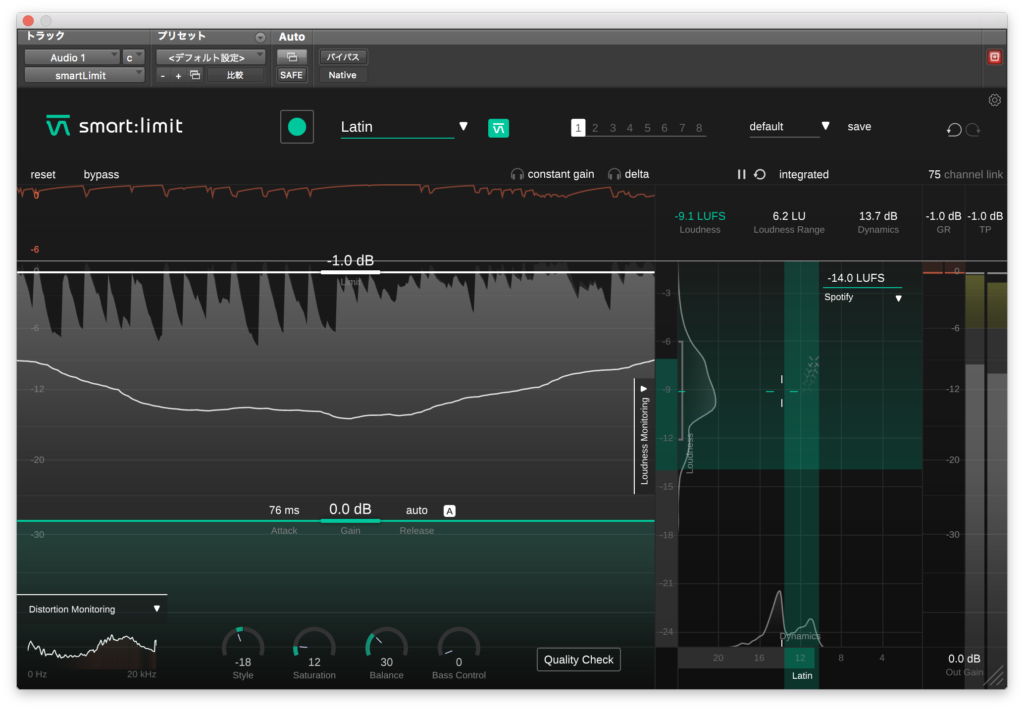
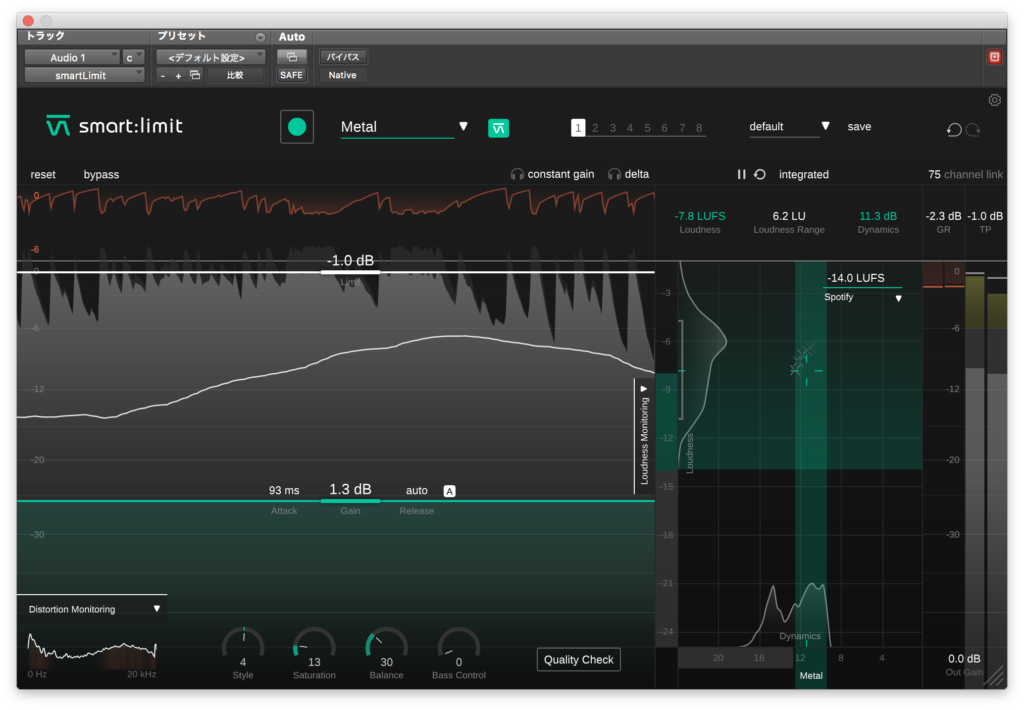
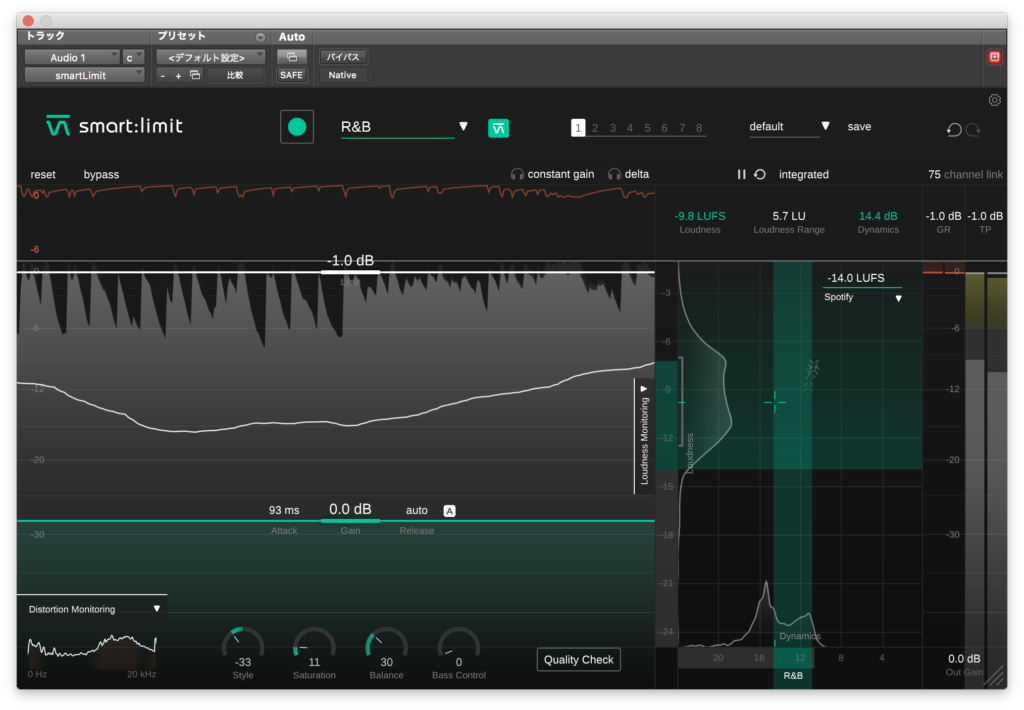
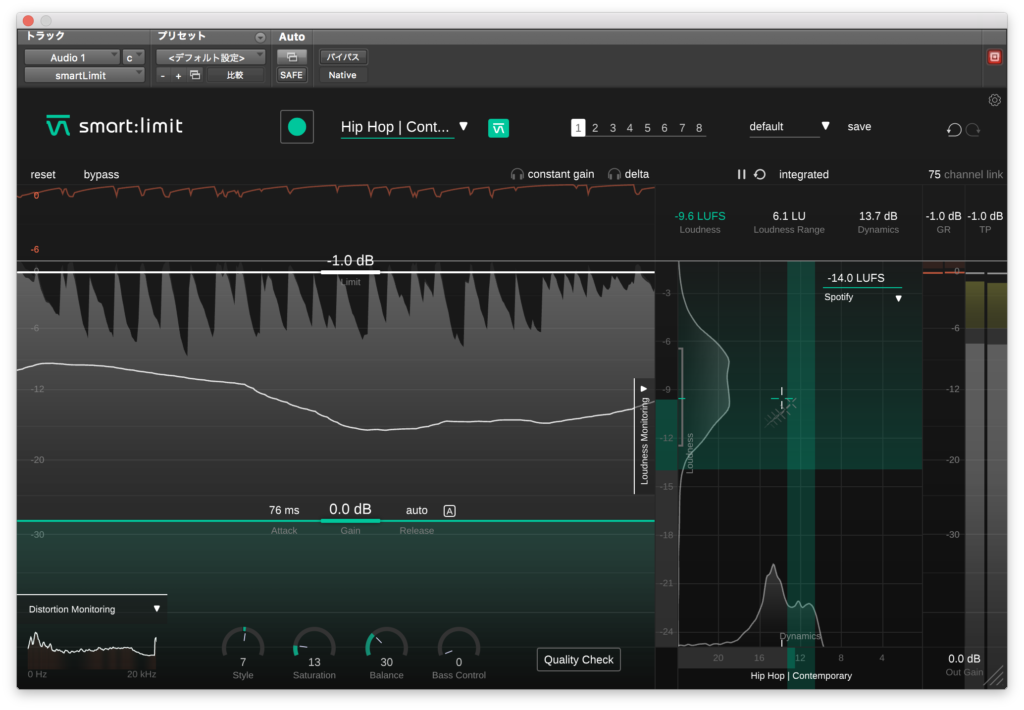
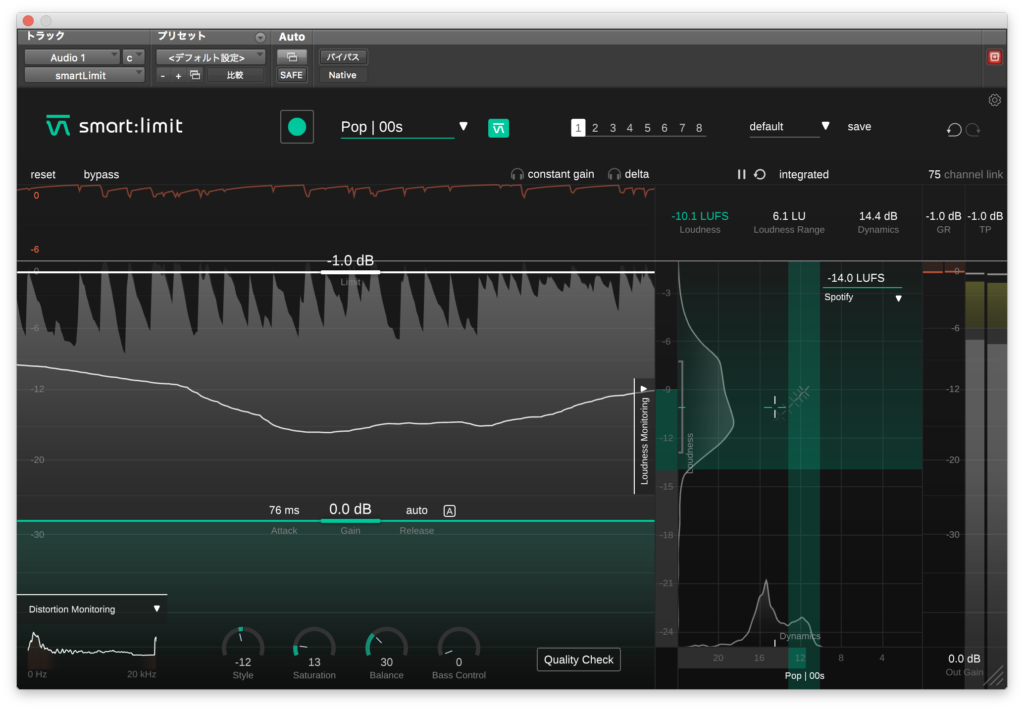
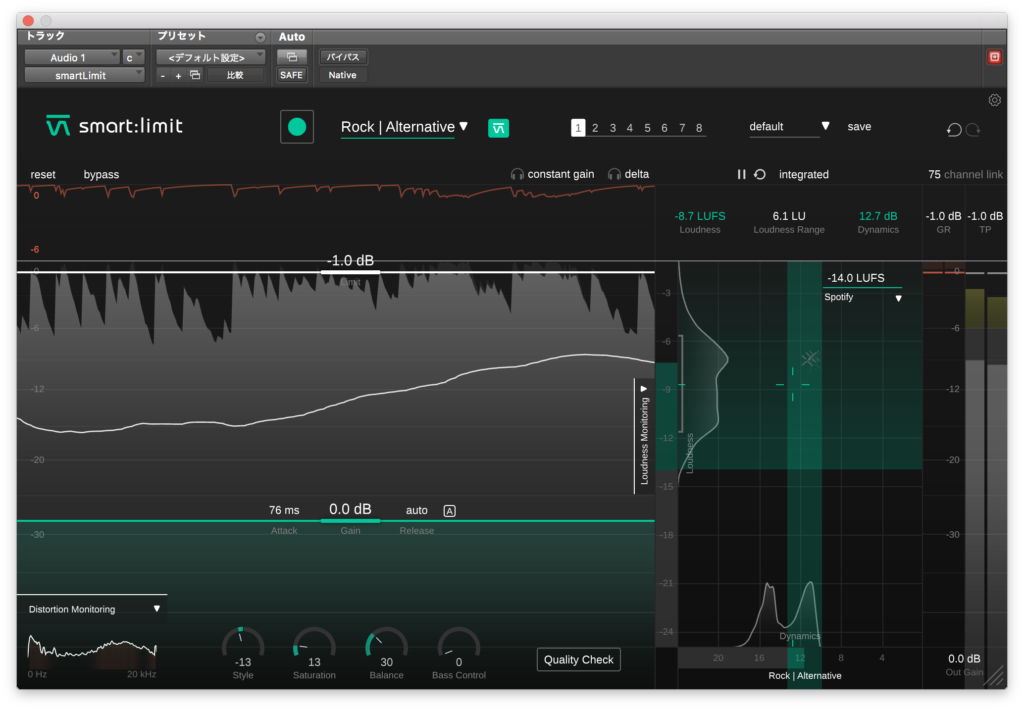
結構選択したジャンルによって違いが表れているように聴こえますね。
さて、次からは細かくパラメーターを見ていくのですが、このUniversalを元にしようかなと思います。
![](https://sounds-detour.com/wp-content/uploads/2022/09/bdafbeab570571d6cd46f91514e53e5e-1024x710.png)
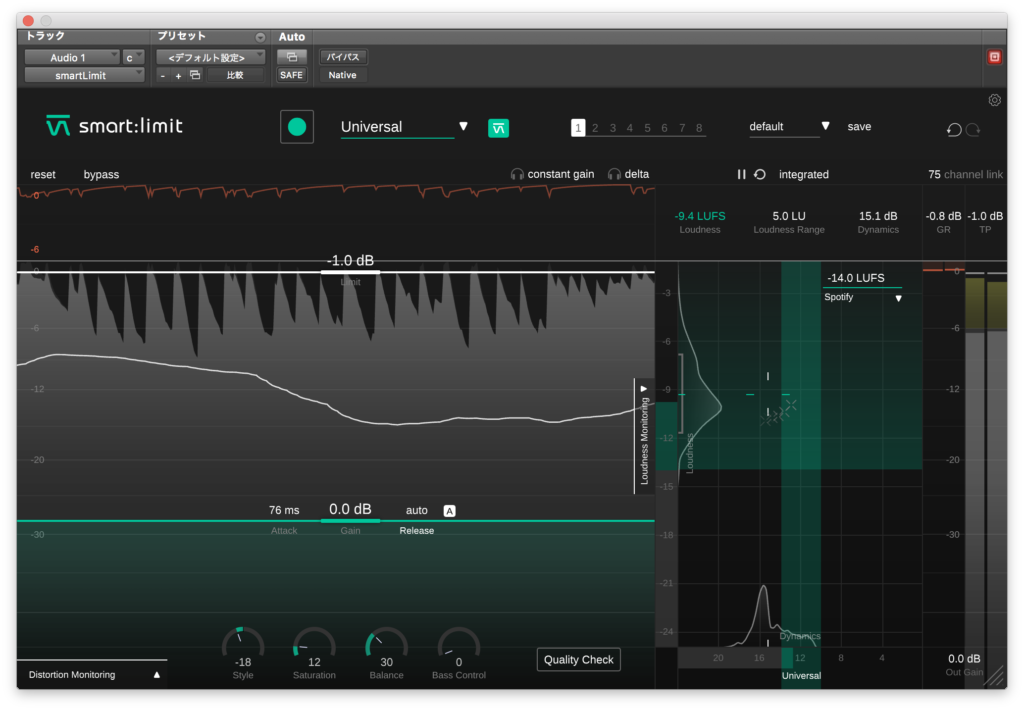
まず、Attackの設定範囲は0ms〜400ms、Releaseの設定範囲は1msz〜1000msまたはAutoです。
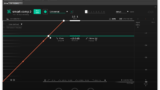
白い線がThresholdで出力の上限、緑の線がGainで入力レベルなのはよくあるリミッターと同じですね。
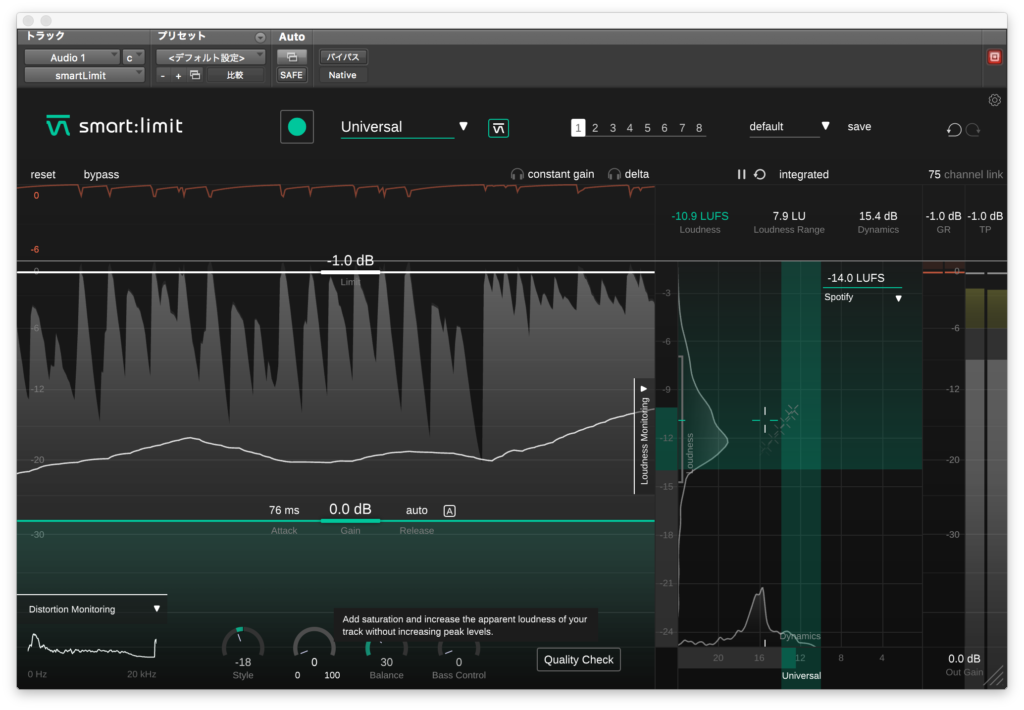
下にある4つのパラメーターですが、まずStyleは左に回すとsoftとなり、あまりリミッター感を感じさせない自然なリミッティングに、
右に回すとhardとなっていき、パンチのあるサウンドになるそうです。
![](https://sounds-detour.com/wp-content/uploads/2022/09/e7e3715e7bd2d2b68e9c854ac27b1645-1024x710.png)
![](https://sounds-detour.com/wp-content/uploads/2022/09/65a4c5a644580f6830b17d30ecbd0253-1024x710.png)
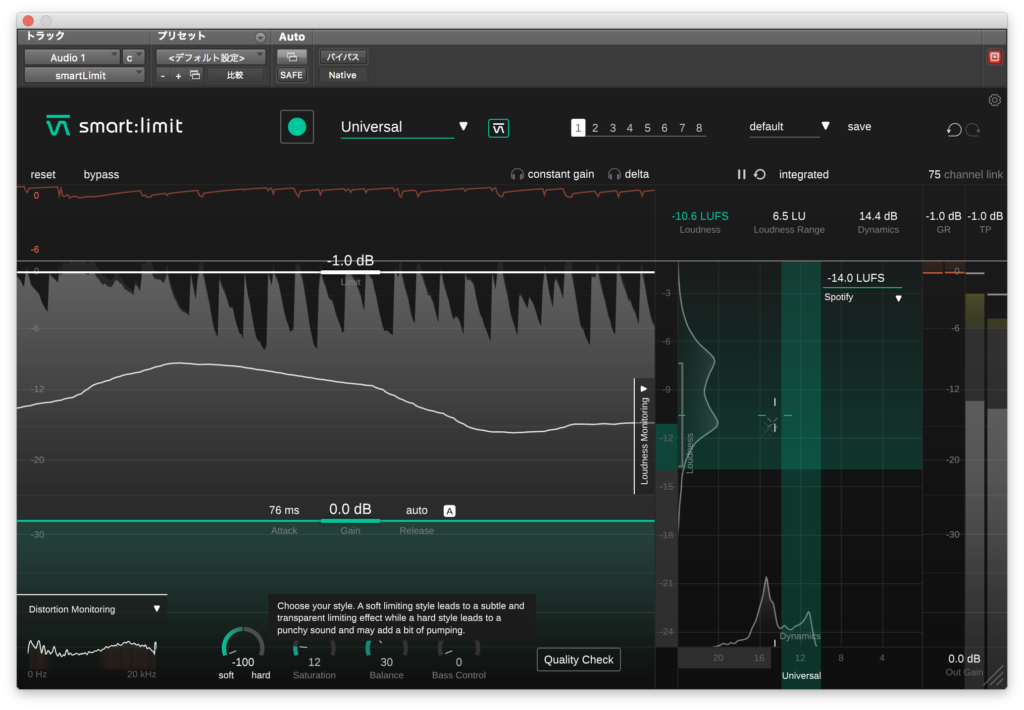
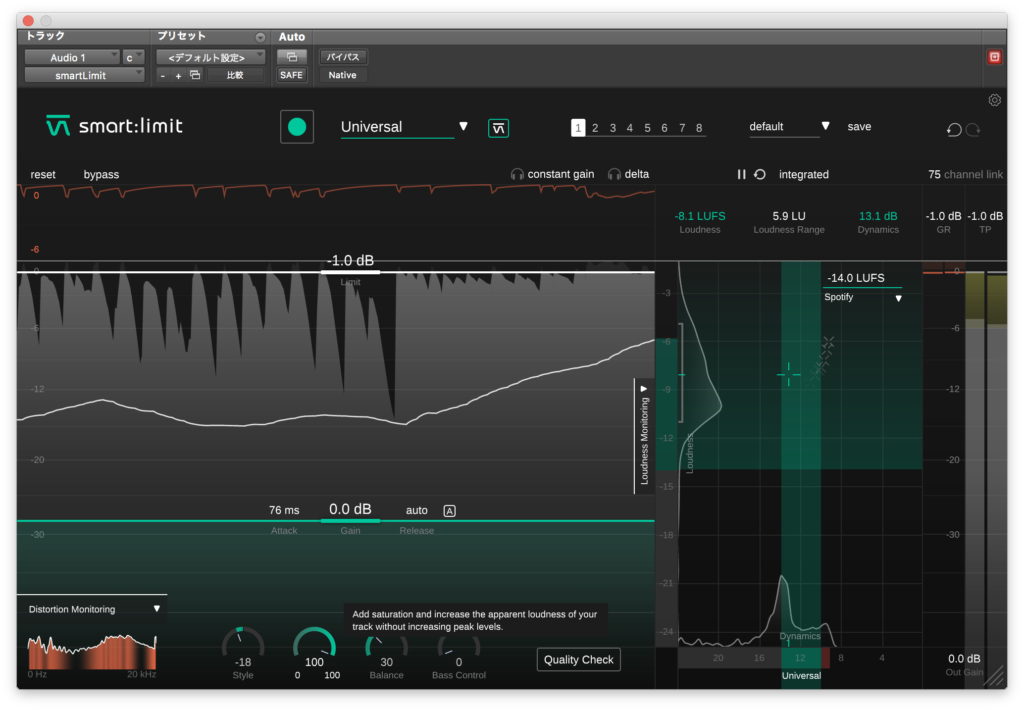
Saturationはその名の通り倍音感ですね。マニュアルにはトゥルーレベルを上げる事なくラウドネスを上げると書いてあります。
![](https://sounds-detour.com/wp-content/uploads/2022/09/d9846ef3b0c6b3361efff08cc81e324e-1024x710.png)
![](https://sounds-detour.com/wp-content/uploads/2022/09/a951fae15e202870f53c30d3c832bb7d-1024x710.png)
Balanceは帯域バランスを整えるパラメーターのようです。
![](https://sounds-detour.com/wp-content/uploads/2022/09/982f19d780da4fcc8b50e83ee1dc751e-1024x710.png)
![](https://sounds-detour.com/wp-content/uploads/2022/09/7fb1ab5ba79c86db604921645f065fa4-1024x710.png)
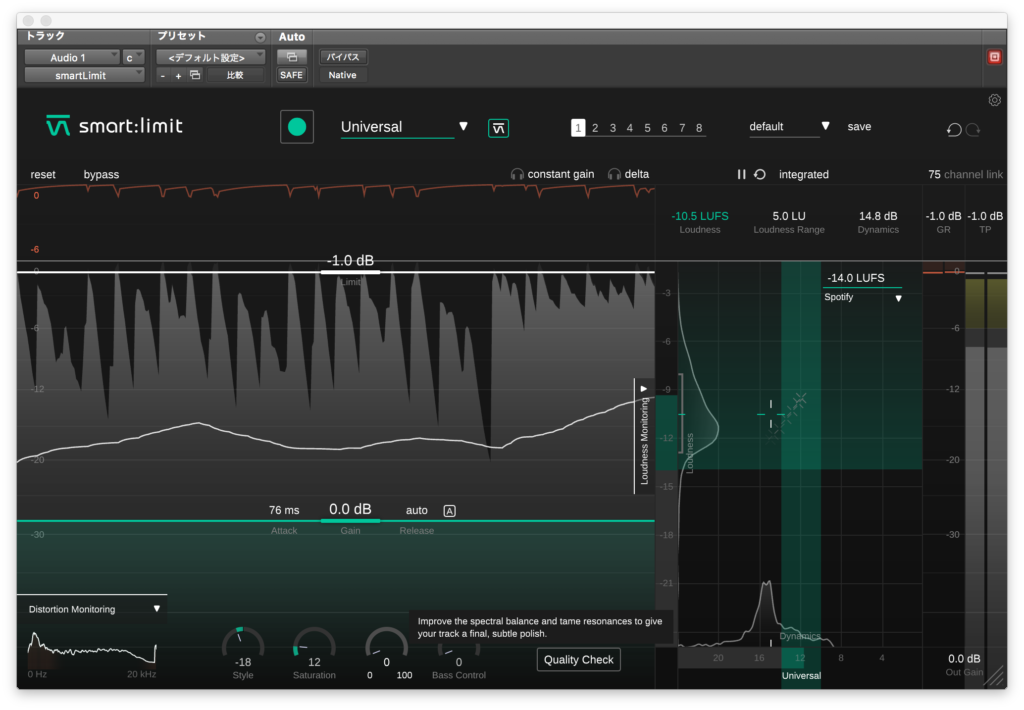
Bass Controlは低域の強さですね。
![](https://sounds-detour.com/wp-content/uploads/2022/09/1e7f731040b58c1db83defb00292499e-1024x710.png)
![](https://sounds-detour.com/wp-content/uploads/2022/09/aa0c797e0d9156c1c815e22454f6a1aa-1024x710.png)
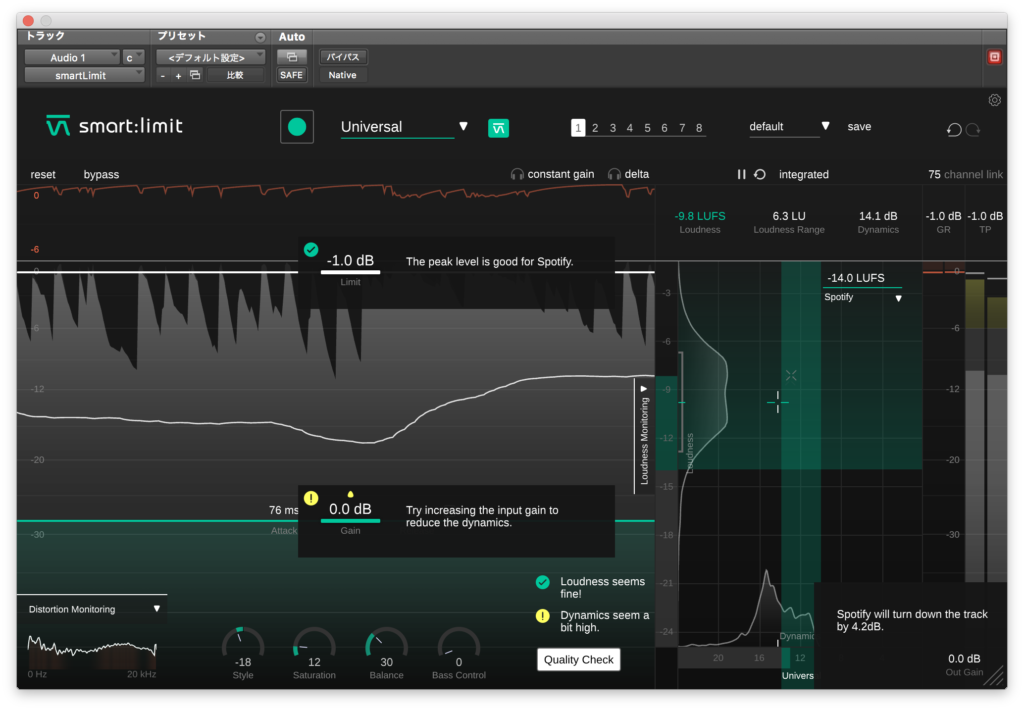
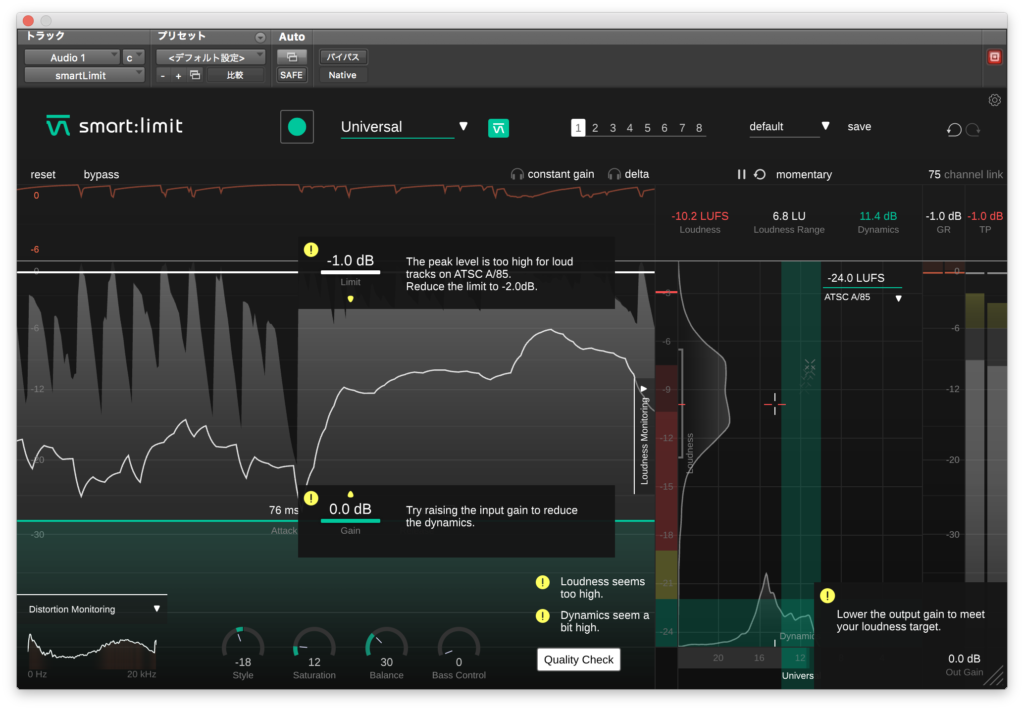
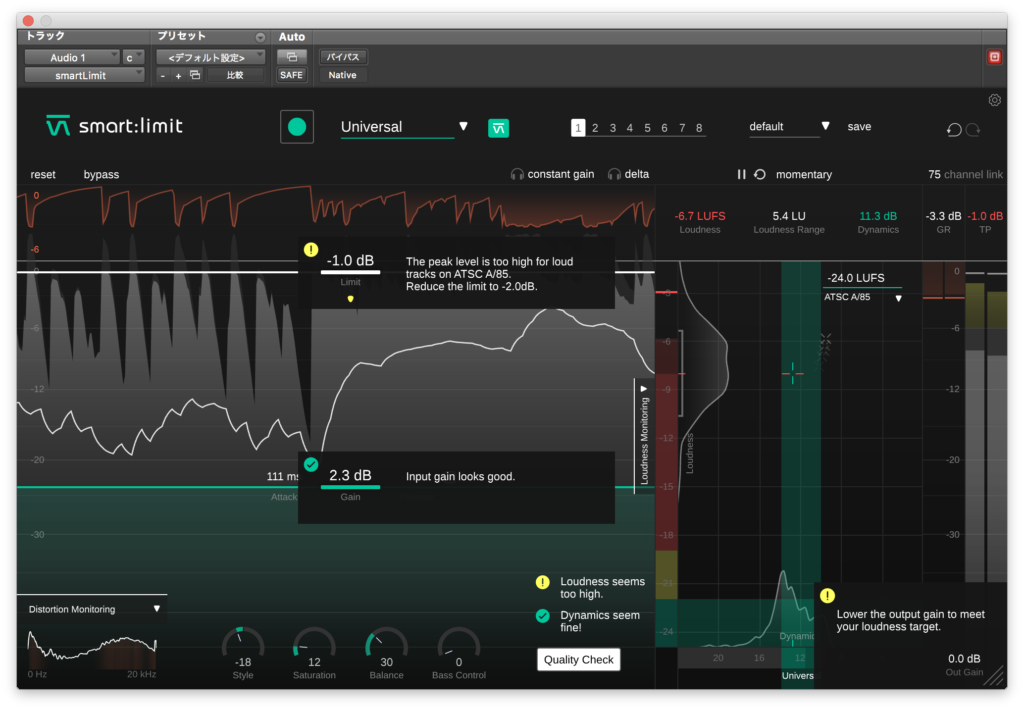
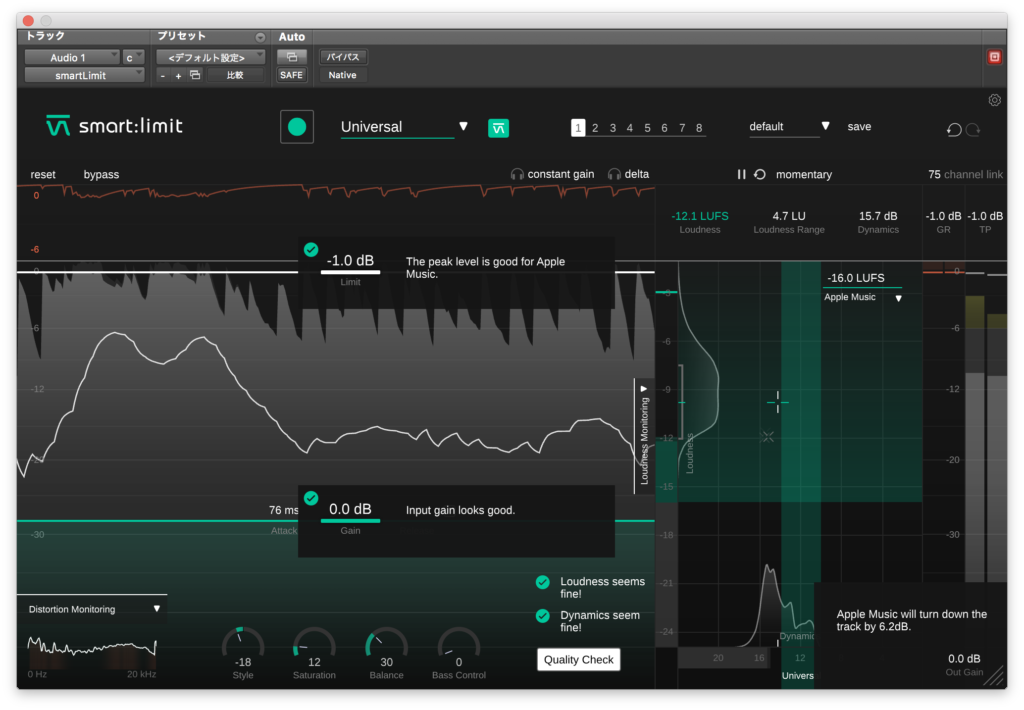
Quality Checkを押すと今の音がおおよそ適切かどうかを判断してくれます。(右上でストリーミング媒体の種類を選択します)
![](https://sounds-detour.com/wp-content/uploads/2022/09/285b9283f3e4aad4289a01728ed9da30-1024x710.png)
中央上のヘッドホンマークはconstant gainが入力音量に出力音量を揃えるいわゆるGain matchの機能で
deltaが出力音から入力音を引き算して差の音のみを出力するモードですね。
右上のchannnel linkは左右でのリダクションを揃えるパラメーターで値を上げるほど左右でおなじリダクションが適用されます。
リミッターの操作はこれで全てかなと思います。右半分はアナライザーがついていますね。
まず、右上のintegratedはアナライザーの更新頻度の調整で、他にshort term、momentaryの計3種類が選べるようになっています。
![](https://sounds-detour.com/wp-content/uploads/2022/09/9fa69fbd4aef1f33d82974ad1f7a0f58-1024x710.png)
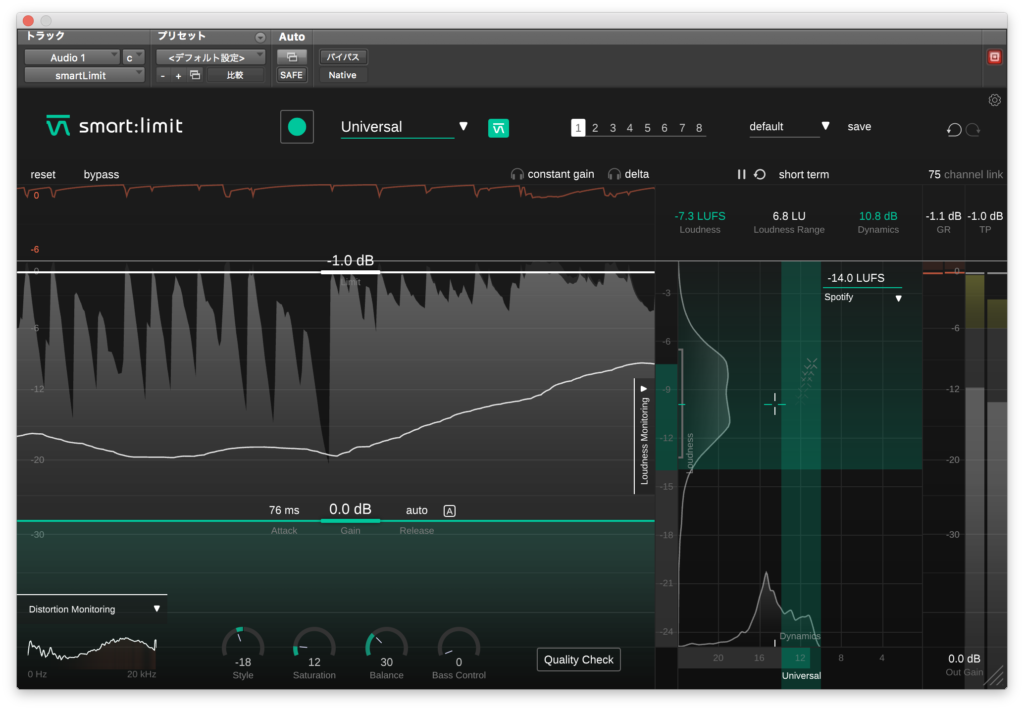
アナライザーは縦軸にLoudness(音圧)、横軸にDynamics(音量の高低)を軸にしているのが見て取れると思います。
Learnで選択した音楽ジャンルに合ったLoudnessとDynamicsが緑の色で塗られ、指標を示してくれています。
媒体
![](https://sounds-detour.com/wp-content/uploads/2022/09/00185f8187cb7374e6ad8ed112f9aa84-1024x710.png)
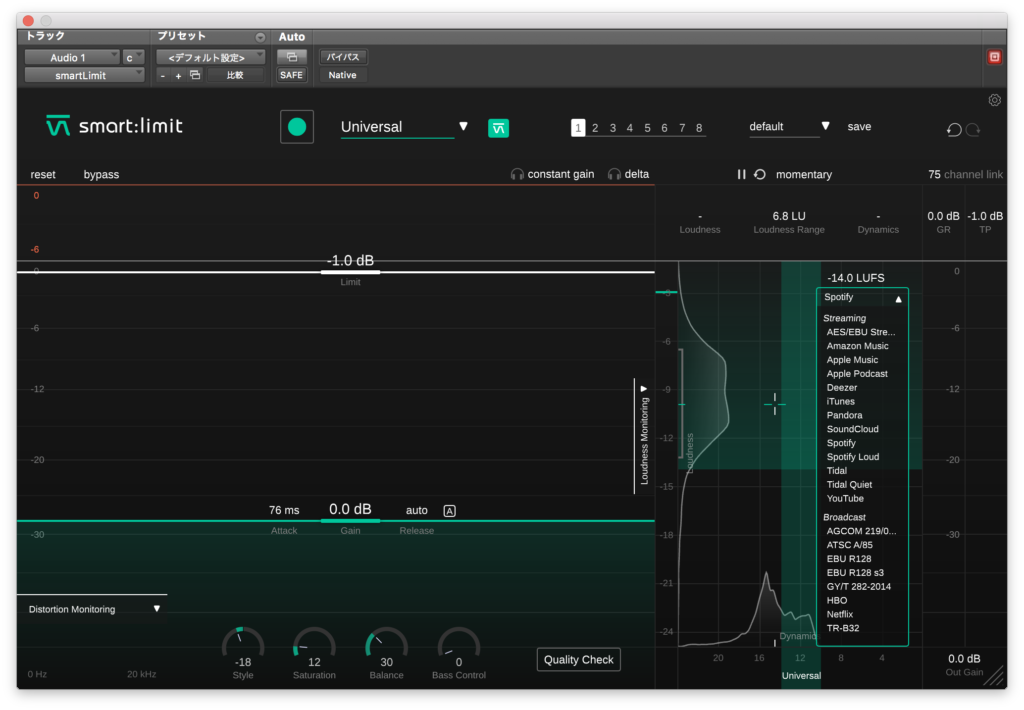
対応するストリーミング媒体の種類は多めに収録されているので主要なものは揃っているかなと思います。
![](https://sounds-detour.com/wp-content/uploads/2022/09/d4e3e78197ef771456ace98c4472a973-1024x710.png)
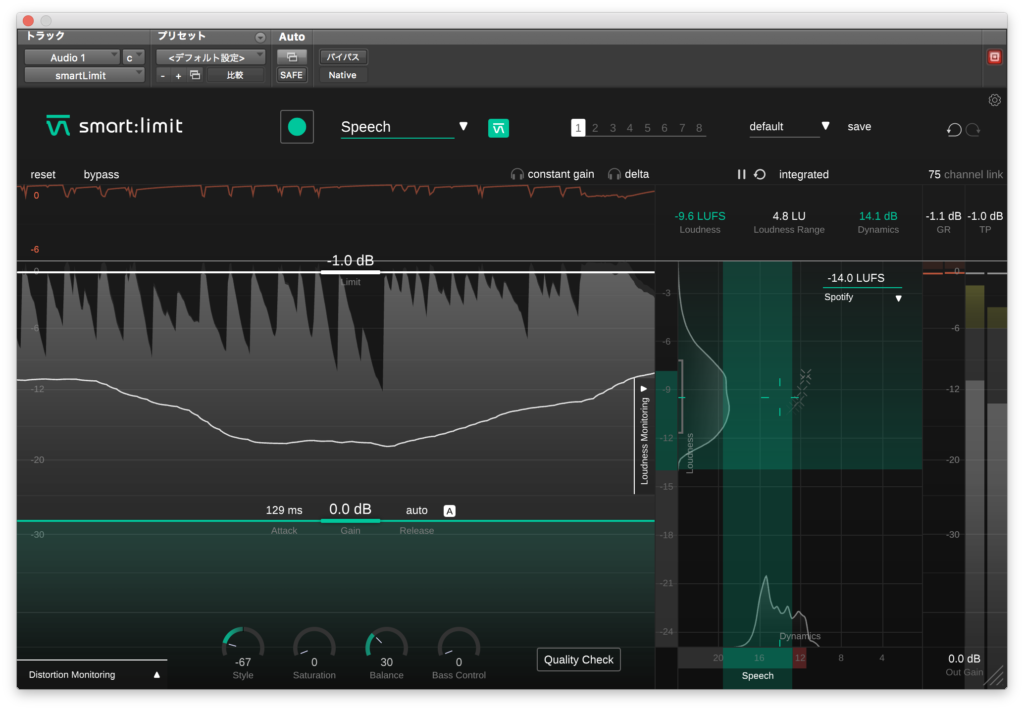
さらにここで先ほどのLearnを試してみると
![](https://sounds-detour.com/wp-content/uploads/2022/09/55bb4584c6c320164b0b9caec53a4317-1024x710.png)
結果が微妙に変わり、ストリーミング媒体にある程度合わせてくれていることがわかります。
![](https://sounds-detour.com/wp-content/uploads/2022/09/89413243ba134fd75d8865e689463bd3-1024x710.png)
これはかなり便利な機能ですね。
まとめ
AI機能がなくても純粋にリミッターとしてそこまで違和感なくリミッティングが行えているような気がします。
主にリミッターとしての機能が主ではありますが中央下4つのパラメーターにより音の傾向を変えることもできて、調整にも使えるのがありがたいですね。
色々と自動でやってくれるので時短ツールとしてかなり使えるのではないでしょうか。
ショップサイトはこちら↓
smart:comp2の記事はこちら↓
今月のプラグインセール情報をまとめてみました。
よかったら見ていってください。
コメント